
Buying mature pepper plants at the local nursery drains your gardening budget incredibly fast. A single jalapeño transplant in a plastic pot often costs more than the trowel I used to start my entire balcony garden. You can bypass this ridiculous retail markup entirely when you decide to grow peppers from seed on your own kitchen counter. The process requires a little patience but rewards you with massive financial savings and healthier plants.
I started my own patio farm years ago with empty yogurt containers and a cheap eight dollar hand trowel. I assumed starting tiny seeds required an expensive greenhouse and fancy agricultural equipment. That assumption proved completely wrong once I understood what these specific plants actually need to wake up. You can easily turn a dark apartment corner into a highly productive nursery with very basic supplies.
Why you should grow peppers from seed this season
Local garden centers only sell three or four basic pepper varieties every spring. They stock the standard green bells and generic jalapeños because those varieties survive the shipping process in large commercial trucks. When you grow peppers from seed, you unlock hundreds of unique flavors and heat levels. You get to choose exact varieties bred specifically for cramped balcony containers.
Here in Portland, our notoriously wet and gloomy spring weather creates a massive problem for heat loving crops. The outdoor soil stays freezing cold well into late May, which stunts young transplants completely. Deciding to grow peppers from seed gives you a crucial eight week head start on the actual growing season. You control the climate perfectly until the Oregon weather finally decides to warm up.
Saving money remains the absolute best reason to tackle this indoor project. A single packet of seeds costs about three dollars and yields up to thirty individual plants. You can keep the best three bushes for your own patio and give the rest away to your neighbors.
Selecting the smartest varieties for your small space
Large bell pepper plants demand massive amounts of soil volume to produce big, blocky fruits. Those towering plants often struggle in small five gallon patio containers. You want to look for compact bush varieties that naturally stay short and stocky.
The online seed catalogs at Burpee feature dozens of miniature and patio specific pepper varieties. Shishito peppers and small Thai chilies perform incredibly well in restricted plastic pots. They produce massive yields without requiring heavy metal cages for physical support.
Always check the estimated days to maturity printed on the back of the seed packet. Choose fast maturing varieties that ripen in under seventy days to guarantee a solid harvest before the autumn frost arrives.
Gathering your indoor nursery supplies
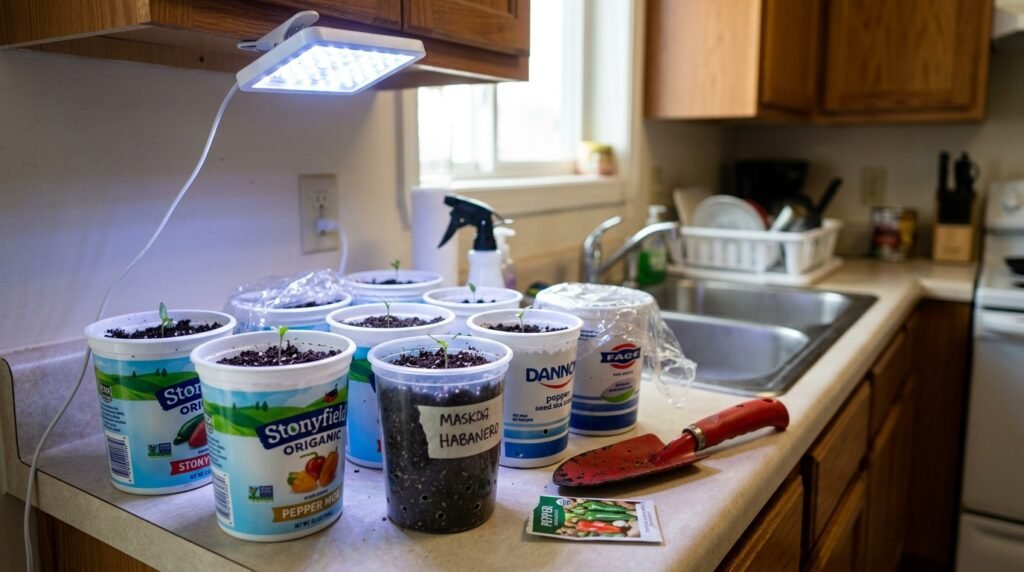
You absolutely do not need expensive peat pellets or fancy plastic domes to grow peppers from seed successfully. I still use washed out yogurt cups with holes poked in the bottom for my initial planting containers. Just make sure you wash the recycled plastic thoroughly with hot soapy water first to prevent nasty mold growth.
You must buy a sterile, commercial seed starting mix rather than standard potting dirt. Standard potting soil contains heavy chunks of wood and bark that physically block tiny sprouts from reaching the surface. A light, fluffy starting mix provides the perfect texture for fragile new roots to navigate easily.
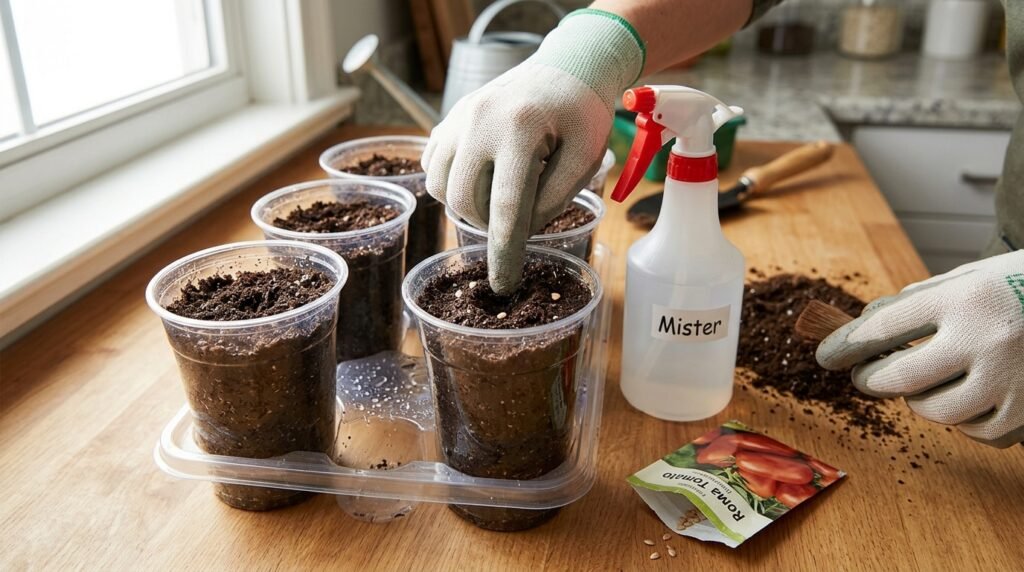
Moisten the starting mix in a large kitchen bowl before you fill your plastic cups. Dry mix actually repels water at first, which forces the seeds to float away. You want the dirt to feel exactly like a damp kitchen sponge before you plant anything.
Planting depth and moisture control
Push two seeds into the center of each damp cup about a quarter inch deep. Planting two seeds guarantees that at least one will sprout successfully. Cover them lightly with soil and press down gently to ensure good physical contact.
Learning how to start seeds indoors before the growing season means keeping the top layer of dirt constantly damp. Use a cheap plastic spray bottle to mist the surface every morning. Pouring a heavy stream of water from a cup will completely wash the tiny seeds out of the dirt.
Providing the right heat and light
Pepper seeds refuse to wake up in a cold apartment. The decision to grow peppers from seed requires soil temperatures around eighty degrees to break the hard outer shells. A cheap waterproof seedling heat mat solves this temperature problem completely.
Place the heating mat directly under your plastic cups and leave it plugged in constantly. The seeds usually break through the soil surface in about seven to ten days with consistent bottom heat. Once you see green leaves appear, you must unplug the heat mat immediately to prevent weak, floppy stems.
Young plants desperately need bright overhead light to build strong cellular structures. A dark kitchen window will force the stems to stretch rapidly and snap under their own weight. Hang a basic LED shop light exactly two inches above the top leaves to keep the plants short and incredibly strong.
A non-obvious trick to prevent fungal disease
Indoor starting mixes stay incredibly damp, which often invites a destructive white fungus to grow on the surface. This fungus attacks the base of the plant and kills it overnight. Here is a highly effective trick most beginners completely ignore.
Lightly dust the surface of your damp soil with plain ground cinnamon from your spice rack. Cinnamon acts as a powerful natural fungicide that completely stops mold spores from growing in wet conditions. This simple pantry item protects your vulnerable sprouts during their first few critical weeks.
Moving your indoor plants to larger pots
Your tiny plants will quickly outgrow their initial yogurt cups. Once the peppers develop their second set of true leaves, they need more room to expand their root systems. True leaves look exactly like miniature versions of the adult plant leaves.
Carefully squeeze the sides of the plastic cup to slide the root ball out in one solid piece. Move the plant into a larger four inch container filled with premium potting soil. Figuring out the best soil mix for a raised bed vegetable garden helps you choose dirt that drains quickly and prevents root rot.
This transplanting stage gives the plant access to real nutrients for the very first time. Seed starting mix contains zero food, so the fresh potting soil provides a massive boost of essential nitrogen.
Hardening off before moving outside
Taking an indoor plant and dropping it directly onto a sunny balcony usually ends in sudden death. The harsh ultraviolet light and stiff winds will bleach the leaves white and snap the main stem. You must transition the plants outside slowly over a full week.
This slow transition process is called hardening off. Place your pots in a shady, protected spot on your patio for just two hours on the first day. Bring them back inside to the safety of your kitchen counter.
Increase their outdoor time and their direct sun exposure slightly every single afternoon. I once lost an entire tray of beautiful jalapeños because I skipped this step and rushed them out onto my south facing balcony. Take the full seven days to guarantee their survival.
Final planting and early summer care
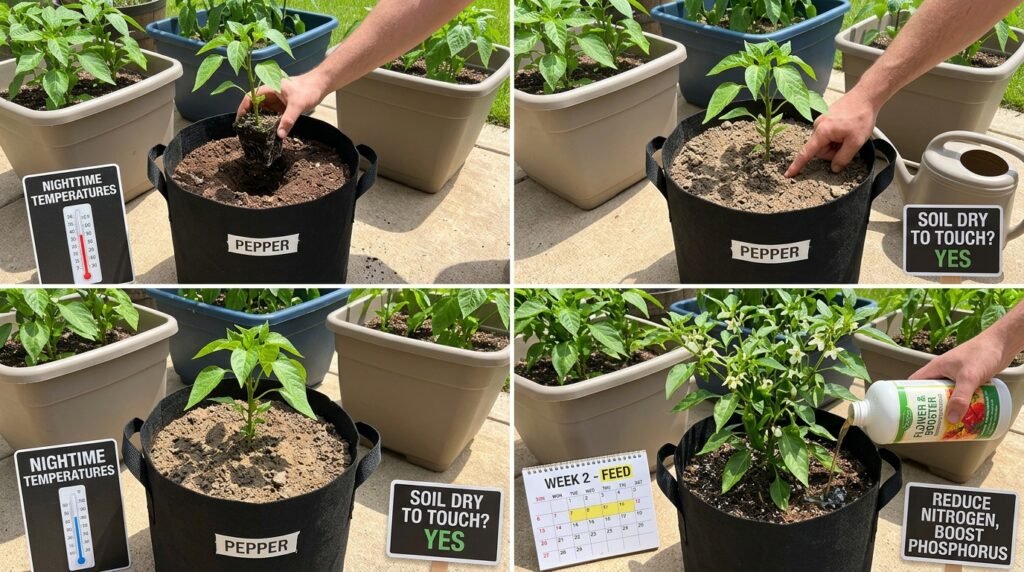
Once the nighttime temperatures stay consistently above fifty five degrees, your plants can stay outside permanently. Move them into their final five gallon fabric grow bags or large plastic patio tubs. Plant the stem slightly deeper in the dirt than it was in the nursery pot to encourage extra root growth along the buried stem.
Understanding how to grow peppers from seed involves careful moisture management as the summer heats up. These plants hate sitting in soggy, waterlogged mud. Wait until the top two inches of dirt feel completely dry to the touch before you grab your watering can.
The experts at The Old Farmer’s Almanac recommend feeding pepper plants with a liquid organic fertilizer every two weeks. Choose a fertilizer higher in phosphorus than nitrogen once the white flowers appear. Too much nitrogen creates a massive green bush with absolutely zero actual fruit.
Pinching early flowers for a massive harvest
New growers get incredibly excited when they spot the first tiny flower buds forming in early June. You must do something that feels completely unnatural to guarantee a heavy harvest later in the season. You need to pinch those early flowers completely off the plant.
Allowing a small plant to produce fruit stunts its overall vertical growth immediately. The plant stops building new leaves and pours all its energy into that single early pepper. Pinching off the first round of flowers forces the plant to grow taller and wider first.
A larger, stronger plant will eventually support triple the amount of fruit in August. It hurts to destroy those first blossoms, but the delayed gratification pays off massively at the end of the summer.
Watching a tiny speck of dirt transform into a massive bush loaded with spicy fruit feels like absolute magic. When you learn to grow peppers from seed, you take total control over your patio farm and your grocery budget. You no longer have to settle for sad, wilted produce from the supermarket shelves.
The process takes a few extra weeks of patience, but the massive harvest makes every single indoor watering session totally worth it. You will quickly realize that choosing to grow peppers from seed is the most rewarding project you can tackle this spring. Grab a cheap bag of starting mix, wash out some old yogurt containers, and start your own balcony nursery today.