Buying baby plants at the local nursery drains your garden budget fast. You pay a massive premium for someone else doing the easy work of putting a tiny speck into dirt. Learning how to start seeds indoors saves you money and unlocks hundreds of unique vegetable varieties. I figured this out during a miserable, freezing spring in Portland when the rain simply refused to stop.
I gathered a stack of washed yogurt containers, bought a cheap eight dollar trowel, and set up a tiny nursery right on my kitchen counter. You do not need massive greenhouses to grow your own food from scratch. You just need patience and a few basic household supplies.

Why you must start seeds indoors this season
Nurseries only stock the most generic tomatoes and peppers every single spring. They pick tough varieties that survive being tossed around in the back of commercial shipping trucks. When you start seeds indoors, you gain total control over exactly what you grow. You can pick compact bush plants bred specifically for cramped apartment balconies.
You also beat the terrible weather that ruins early spring planting. You give your plants a crucial six week head start before the local temperatures finally warm up. This guarantees a much earlier summer harvest for impatient patio growers.
Timing your planting schedule accurately
Planting a seed too early creates a massive, struggling plant trapped in a tiny plastic cup. Planting too late means your tomatoes will freeze on the vine in late October. You must count backward from your average last frost date to get the timing right.
The experts at The Old Farmer’s Almanac offer a highly accurate calculator to figure out exact planting dates for your specific zip code. Write those target dates down on a physical calendar so you do not forget them. Timing represents half the battle in small space gardening.
Choosing containers to start seeds indoors safely
Garden centers push expensive plastic trays and fancy peat pellets on new apartment growers. You absolutely do not need that expensive commercial gear to grow real food. I still use recycled plastic yogurt cups and sour cream tubs for my entire spring setup.
These recycled containers offer plenty of depth for aggressive early root growth. You save money while keeping unnecessary plastic trash out of the local landfill. Just wash them thoroughly with hot soapy water before adding any dirt to prevent annoying mold growth.
The importance of bottom drainage holes
You must punch a few small holes in the bottom of whatever plastic container you decide to use. Standing water rots the fragile new vegetable roots almost instantly. The soil must drain freely to pull fresh oxygen down into the root zone.
Finding out why your seedlings are dying and how to save them almost always leads back to terrible container drainage. Use a sharp nail or a power drill to make three holes in every single cup. Set your cups on an old baking sheet to catch any water that drips out the bottom.
Picking the right dirt to start seeds indoors
Standard potting soil contains heavy chunks of wood and dense compost material. A tiny, fragile sprout cannot physically push through those massive physical obstacles. You must buy a specific bag of sterile seed starting mix for this exact project.
Starting mix contains finely milled peat moss and perlite that stays incredibly light. This fluffy texture allows the delicate microscopic roots to navigate the cup easily. It gives your plants the absolute best chance of surviving their first few weeks.
Pre-moistening your dry soil mix
Seed starting mix repels water straight out of the bag due to the dry peat moss. If you pour water over a dry cup of dirt, the seeds will float right over the edge. You have to rehydrate the material completely before you plant anything.
Pour your dry mix into a large mixing bowl and slowly stir in warm tap water. The dirt should feel exactly like a damp kitchen sponge before you pack it into your cups. This ensures even moisture distribution across your entire indoor nursery.
Providing intense light when you start seeds indoors
A sunny kitchen window simply does not provide enough direct light for hungry vegetable plants. The modern window glass filters the sunlight and the steep angle forces the plants to stretch aggressively. These stretching plants develop weak, thin stems that snap quickly.
You must provide intense overhead lighting to keep the plants short and incredibly strong. A plant that reaches desperately for light wastes valuable energy it should use for root development. Short and stocky plants perform significantly better on a windy balcony.
Setting up a cheap artificial light system
You do not need those purple LED grow lights that cost a fortune online. A standard fluorescent or LED shop light from the local hardware store works perfectly. Hang the light fixture exactly two inches above the top leaves of your plastic cups.
Raise the light fixture slowly every few days as the green leaves grow taller. Keep the light turned on for about fourteen hours every single day. A cheap mechanical outlet timer automates this process so you never have to think about it.
A non-obvious trick to start seeds indoors securely
Indoor plants live a pampered life with zero wind or rough environmental stress. They grow tall but lack the structural strength needed to survive a real patio environment. You can mimic the harsh outdoors using a common household item to build tougher plants.
Set a cheap oscillating desk fan to blow gently across your plants for a few hours every afternoon. The constant physical movement forces the green stems to build thicker cellular walls. This simple trick creates sturdy, thick plants that easily survive the transition to your balcony.

Managing moisture without creating mold
Tiny sprouts consume water rapidly, but soaking them constantly encourages dangerous white mold. You want to keep the top layer of dirt slightly damp at all times. A cheap plastic spray bottle delivers the perfect amount of moisture without blasting the dirt away.
Check the cups every morning and mist the surface if it looks light brown and dusty. If the dirt looks dark black, leave the spray bottle alone entirely. Overwatering kills more indoor plants than outright neglect ever will.
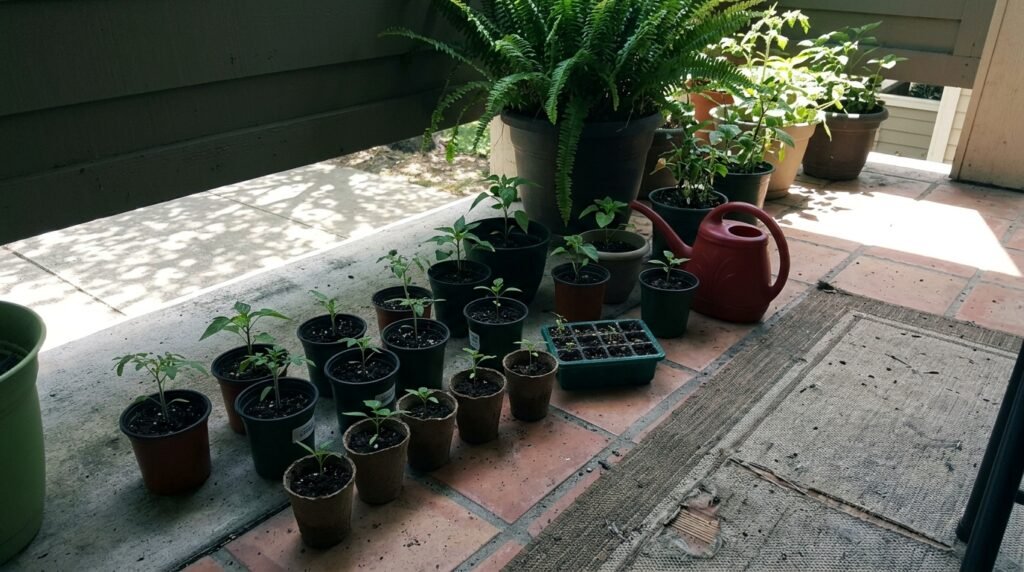
Moving your plants to larger containers
Your plants will completely outgrow their tiny yogurt cups after about three or four weeks. The roots will start circling the bottom of the plastic looking for more space to expand. You must move them into larger four inch pots filled with real potting soil.
Carefully squeeze the sides of the yogurt cup to slide the root ball out in one solid piece. Never pull the plant upward by its fragile green stem or you will kill it instantly. Handle the plant strictly by the leaves or the dirt block.
Adding organic nutrients for the first time
Seed starting mix contains absolutely zero food for your rapidly growing plants. The fresh potting soil provides the first real meal they will ever eat. Reviewing the best soil mix for a raised bed vegetable garden guides you toward blends rich in compost and perlite.
A strong nutritional foundation here guarantees aggressive summer growth later on. Water the newly transplanted pots deeply to settle the fresh dirt around the roots. Put them right back under your artificial shop lights to recover from the stress.
The final step when you start seeds indoors
Taking a pampered indoor plant and throwing it directly onto a sunny balcony usually ends in disaster. The intense ultraviolet light and rough wind will shock the plant completely. You must introduce them to the harsh outdoor world very slowly over a full week.
This critical transition period gives the leaves time to build up a protective waxy coating. Plants cannot produce sunscreen, so they need time to adapt to the physical radiation. Rushing this step destroys weeks of careful indoor work.
Hardening off your new plants safely
Place your pots in a heavily shaded spot on your patio for just two hours on the first day. Bring them back inside to the safety of your kitchen counter before the wind picks up. Increase their outdoor time and direct sun exposure slightly every single afternoon.
Do not rush this hardening off process under any circumstances. Reading about 10 beginner gardening mistakes and how to fix them shows that skipping this step kills millions of healthy plants every May. Take the full seven days to guarantee your hard work actually survives the summer.
Watching a dry, hard seed turn into a massive producing plant feels incredibly rewarding. It connects you directly to the food you eat and the dirt on your patio. You save cash, discover amazing new vegetable varieties, and build serious gardening confidence. Grab some old plastic cups and a bag of starting mix this weekend. When you decide to start seeds indoors, you take total control of your small balcony farm.