
Buying bags of premium dirt eats up your entire gardening budget fast. You do not need expensive commercial blends to grow healthy vegetables on a balcony. You can easily improve poor garden soil using free materials lying around your apartment building.
I learned this out of pure necessity during my first year growing food. I spent all my cash building a DIY raised bed and buying my trusty eight dollar trowel. I had absolutely nothing left in the bank to fill my recycled yogurt containers.
The constant Portland rain turned my cheap bagged dirt into a solid brick of heavy mud. I had to figure out cheap ways to fix that heavy dirt before my fragile seedlings suffocated completely.
Why you must improve poor garden soil before planting
Plants breathe through their roots just as much as they drink water. When dirt compresses into a solid block, it squeezes out all the microscopic oxygen pockets. The roots literally suffocate and the plant stops growing entirely.
Heavy dirt also traps excess water and causes aggressive root rot. A drowning plant looks exactly like a thirsty plant. The leaves droop and turn yellow, prompting beginners to add even more water to a fatal situation.
You must break up this dense material to give your roots a fighting chance. Loose dirt allows fragile new roots to push deep into the container and anchor the plant securely against the wind.
Understanding container dirt compaction
Gravity pulls the heaviest dirt particles down to the bottom of your plastic pots all summer long. Every time you grab your watering can, you force those particles closer together. By the end of August, the bottom of your pot feels like a solid brick of concrete.
You cannot just plant a new seed into this exhausted, rock hard material next spring. You have to physically dump the container out onto a tarp and break the clumps apart with your hands. Finding the best soil mix for a raised bed vegetable garden shows you exactly what healthy texture looks like. You want loose material that crumbles easily in your bare hands.
Reusing old potting dirt safely
Last year your tomato plants sucked every single nutrient out of your balcony pots. Leaving that same dirt sitting outside all winter turns it into a barren wasteland. You must add fresh organic matter back into the system every spring.
You also run the risk of harboring overwintering pests and aggressive fungal diseases. Aphid eggs and powdery mildew spores survive freezing temperatures easily. You must treat this old dirt before you plant anything new in it.
Throwing old dirt into the trash wastes money and creates heavy garbage bags. You can sanitize and recycle every single ounce of last year’s soil right on your patio.
Solarizing dirt to kill annoying pests
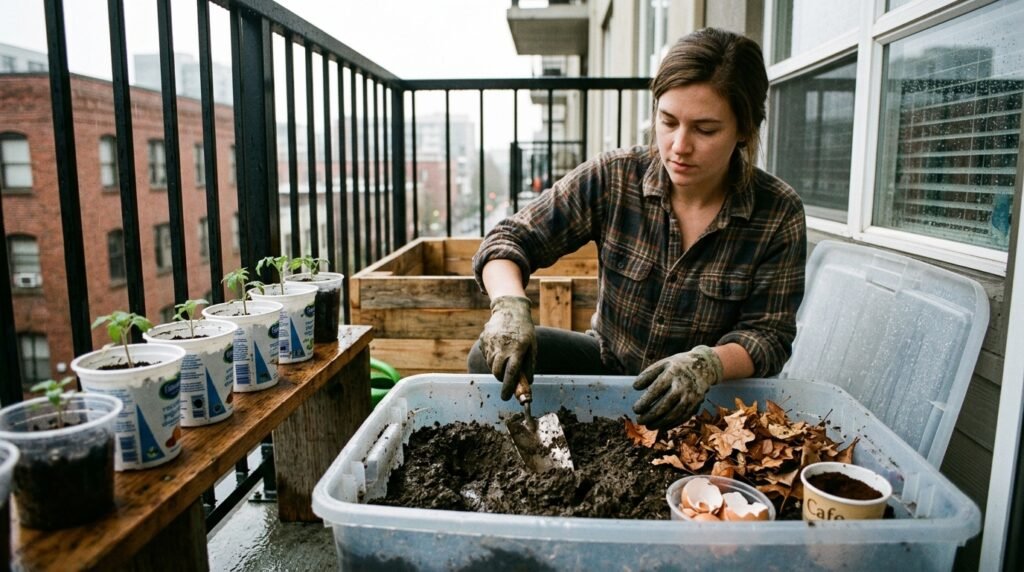
You can use the brutal heat of the sun to cook pests completely out of your old dirt. Dump the exhausted potting soil into a thick black plastic garbage bag. Tie the top of the bag tightly to seal the air inside.
Leave this black bag sitting in direct sunlight on your hot concrete balcony for about three weeks. The internal temperature will spike high enough to cook weed seeds, insect eggs, and harmful fungal spores. This simple trick gives you a completely sterile slate for the new growing season.
Free autumn leaves improve poor garden soil fast
Nature provides the absolute best soil conditioner completely for free every single autumn. Deciduous trees drop millions of leaves that slowly break down into a rich, dark material called leaf mold.
This natural compost lightens heavy dirt and drastically increases moisture retention in the summer. It acts like a giant sponge inside your plastic pots. The roots can easily pull moisture from the rotting leaves during a severe heatwave.
Bagged leaf mold costs a premium at the local garden center. You can make it yourself using nothing but time and a little bit of physical effort.

Collecting and crushing dry leaves
Grab a heavy plastic trash bag and walk around your neighborhood on a dry afternoon. Collect crisp, brown leaves from local sidewalks and community parks. Avoid waxy leaves from evergreen trees because they take years to decompose properly.
Crush the dry leaves into tiny flakes using your bare hands or a simple lawn mower. Mix these crushed flakes directly into your old potting soil. As they break down, they invite beneficial microscopic life back into your pots.
Kitchen scraps save money and improve poor garden soil
You throw away incredibly valuable plant food every time you cook dinner. Eggshells, vegetable peelings, and apple cores contain massive amounts of essential minerals. You can turn this daily garbage into premium plant food right on your apartment patio.
Synthetic chemical fertilizers provide a fast shock of nitrogen but destroy the long term health of the dirt. Organic compost feeds the plants slowly and builds a permanent structural foundation in your pots.
Stop throwing money into the local landfill. Save your food waste and put it back to work growing your next harvest.
Starting a small balcony compost bin
You do not need a massive wooden bin to make compost at home. A simple five gallon bucket with a tight lid works perfectly in small spaces. Drill a few air holes in the sides and layer your kitchen scraps with shredded newspaper.
Reading how to make compost at home in a small space proves this process creates absolutely zero bad smells. You just need to keep the bucket slightly damp and turn the contents occasionally with your trowel. Within a few months, you get black, nutrient dense compost for free.
The non-obvious trick using coffee grounds
Coffee grounds provide a massive boost of pure nitrogen to hungry vegetable plants. Most people just dump the wet grounds directly on top of their potted plants. This actually creates a solid, moldy crust that repels water completely.
When you water a pot covered in thick coffee grounds, the liquid just runs down the sides. The plant roots receive absolutely no moisture and slowly die of thirst. You must apply this free resource correctly to get any actual benefit.
Using leftover coffee grounds correctly helps you improve poor garden soil without creating a water barrier.
Mixing grounds properly into the dirt
You must mix the wet coffee grounds thoroughly into the top three inches of your potting soil. The experts at Gardening Know How confirm that mixing grounds directly into the dirt prevents that dangerous hard crust from forming.
The grounds feed hungry earthworms and beneficial bacteria living deep in your containers. Here in Portland, almost every local coffee shop gives away massive bags of used grounds for free. You just have to walk in and ask the barista nicely for their daily waste.
Cheap perlite alternatives to improve poor garden soil
Good dirt needs small white rocks called perlite to keep it fluffy and prevent compaction. Buying giant bags of perlite from the garden center costs a ridiculous amount of money.
You can find much cheaper alternatives at the local hardware store to achieve the exact same result. You just need a coarse material that creates permanent air pockets under the surface.
Do not skip adding drainage materials to your pots. Without them, your dirt will settle back into a dense mud puddle after a few weeks of heavy watering.
Using coarse construction sand
Never use fine play sand from a sandbox because it turns potting soil into solid concrete. You want coarse builder sand or agricultural sand that contains larger, jagged particles.
Mixing two shovels of coarse sand into your heavy dirt creates permanent drainage channels for excess water to escape. This heavy sand also acts as a fantastic anchor for tall plants on a windy balcony. It stops top heavy tomato plants from blowing over during a summer storm.
Wood ashes add free potassium and calcium
If you have a fireplace or a backyard fire pit, you possess a fantastic source of free minerals. Clean wood ashes contain heavy amounts of calcium and potassium.
These specific minerals help tomato and pepper plants produce stronger, thicker cell walls. Strong cell walls prevent the fruit from splitting open after a heavy rainstorm. Using natural wood ashes is a forgotten way to improve poor garden soil quickly.
You can store cold ashes in a metal tin and use them sparingly throughout the entire growing season.
Applying ashes carefully and safely
You must use absolute caution when applying wood ashes to your patio containers. Ashes naturally raise the pH level of your dirt and make it highly alkaline. Too much ash will lock up other nutrients and starve your plants.
Sprinkle just a light dusting over the surface of your soil and water it in deeply. Never use ashes from charcoal briquettes or treated lumber. Those unnatural materials contain toxic chemical residues that will poison your future food.
Epsom salts improve poor garden soil overnight
Sometimes your dirt lacks a very specific mineral called magnesium. Without magnesium, plants cannot produce green chlorophyll and their lower leaves turn a sickly yellow color.
You can fix this specific deficiency for about three dollars at the local pharmacy. You do not need expensive specialized plant tonics to solve basic nutrient shortages. A simple bag of plain bath salts does the exact same job.
You probably already have this cheap remedy sitting under your bathroom sink right now.
Creating a simple magnesium spray
Standard Epsom salts consist entirely of pure magnesium sulfate. Understanding how to deal with yellow leaves on vegetable plants often involves treating this exact mineral shortage.
Dissolve one tablespoon of plain Epsom salt into a gallon of warm tap water. Pour this mixture directly onto your potting soil once a month during the heavy summer growing season. The plants absorb the magnesium instantly and the yellow leaves turn bright green within a week.
Cover crops work in small containers too
Farmers plant specific crops in the winter just to chop them down and let them rot into the dirt. These cover crops prevent erosion and push fresh nitrogen directly into the earth.
You can execute this exact same professional farming strategy inside a plastic tub on your balcony. It keeps your soil active and healthy during the dark winter months.
This strategy helps improve poor garden soil while the container sits completely empty waiting for spring.
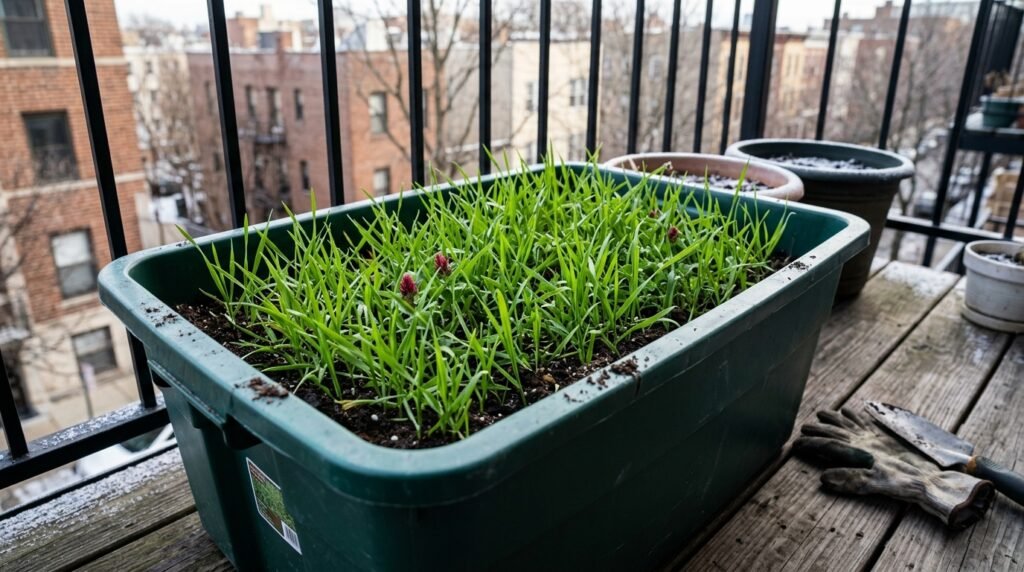
Planting peas and beans for soil health
Legumes like peas and bush beans possess a unique ability to pull nitrogen gas right out of the air. They store this valuable nitrogen in tiny nodules attached directly to their roots underground.
According to the agricultural team at The Old Farmer’s Almanac, leaving these roots in the dirt after harvest feeds your future crops completely for free. When your bean plants die in the autumn, cut the stem at the soil line and leave the roots buried. They will decompose all winter and leave behind a massive reserve of free fertilizer.
You do not need to spend your entire paycheck on fancy bags of premium dirt. Look around your apartment and your neighborhood for free sources of organic matter. Crushed leaves, old coffee grounds, and kitchen scraps hold massive amounts of trapped energy. Adding these free materials back into your pots creates a thriving ecosystem for your vegetable roots. You can definitely improve poor garden soil and grow an incredible harvest without spending a single dollar.