Most garden centers want you to spend hundreds of dollars on fancy cedar planter boxes. That price tag discourages many new growers from ever trying to grow their own food. You absolutely do not need an expensive kit to start farming on your patio or in a small yard. Deciding to build a raised garden bed requires minimal carpentry skills and a very small budget.
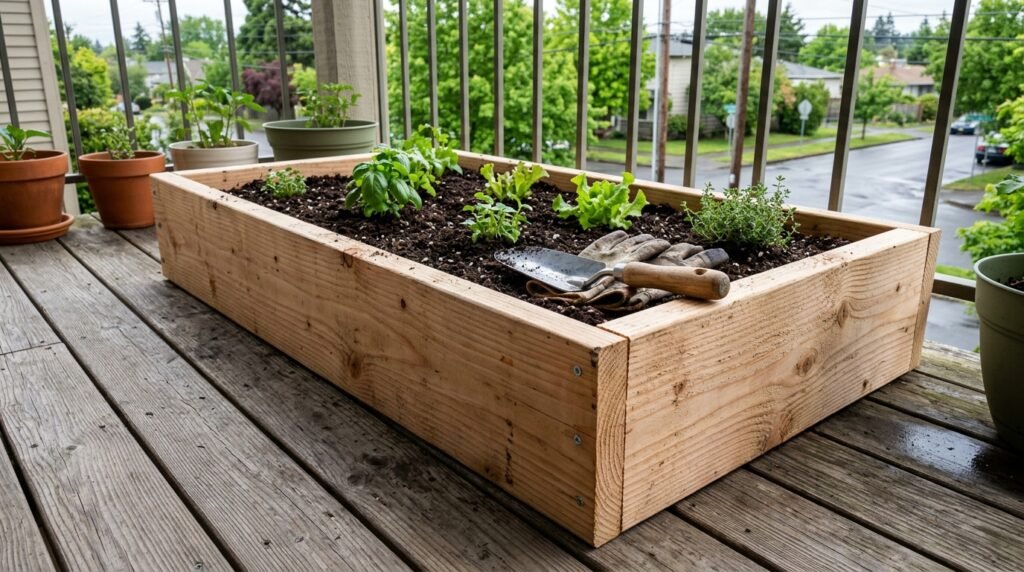
Five years ago I looked at my rented Portland balcony and wanted more than just my old yogurt containers. I walked to the local hardware store with an eight-dollar trowel and figured out how to make a sturdy wooden frame for very little money. That simple weekend project completely changed how much food I could harvest. You can easily replicate this exact process for under fifty dollars.
Why you should build a raised garden bed on a budget
Buying pre-made wooden boxes drains your gardening budget before you even buy soil or seeds. Those expensive kits often use thin wood that warps after a single season of heavy watering. Making your own frame guarantees you get solid lumber that actually holds up to the weather.
Here in Portland our endless spring rain turns poorly constructed boxes into soggy rotting messes very quickly. Using thick standard lumber provides the structural integrity you need to support hundreds of pounds of wet dirt. You control the exact dimensions to fit your specific balcony or backyard corner.
Saving money on the physical frame leaves you with plenty of cash for high-quality soil and strong starter plants. The dirt matters far more to your vegetable harvest than the expensive wood holding it together.
The benefits of controlling your soil volume
Growing food directly in the ground usually involves fighting hard clay and aggressive weeds. A wooden frame lifts your plants above the poor native soil and gives you a completely clean slate. You get to decide exactly what nutrients go into the root zone from day one.
This elevation also warms the soil up much faster in the early spring. The sun hits the wooden sides and heats the dirt weeks before the ground unfreezes. That extra warmth allows you to plant your warm weather crops slightly earlier in the season.
The elevated height also saves your lower back from constant bending and kneeling. Tending to your vegetables becomes a comfortable daily habit rather than a painful chore.
Selecting lumber to build a raised garden bed cheaply
Garden blogs constantly tell you to buy premium cedar or redwood for outdoor projects. Cedar naturally resists rotting and repels insects beautifully without any human intervention. It also costs an absolute fortune and will immediately blow your entire fifty-dollar budget.
You need to buy standard untreated pine lumber instead. A two-by-ten pine board costs a fraction of the price of cedar and easily lasts for three to five years. According to the planting experts at Gardening Know How, plain untreated pine is completely safe for growing food and poses no chemical risks to your vegetables.
Never buy pressure-treated lumber for your edible patio garden. The harsh chemicals used to preserve that wood can leach directly into your sensitive potting soil. Stick to cheap raw pine to keep your food safe and your project costs incredibly low.
Sourcing your materials locally
You only need a few basic items from the hardware store to complete this weekend project. You need three pieces of untreated pine lumber measuring two inches thick, ten inches wide, and eight feet long. This specific size provides plenty of depth for vegetable roots to expand downward.
You also need a small box of two-and-a-half-inch exterior deck screws. Exterior screws have a special protective coating that stops them from rusting when exposed to constant outdoor moisture. Regular indoor wood screws will rust quickly and snap under the massive weight of wet soil.
Do not waste money on expensive corner brackets or decorative metal braces. Simple overlapping wood joints fastened with strong screws provide all the stability your dirt requires.
Tools required to build a raised garden bed
You do not need a massive garage workbench or a fancy power saw to put this together. You just need a tape measure, a pencil, and a basic cordless drill. Most people already have a drill in their closet for hanging pictures.
If you do not own a drill, borrow one from a neighbor for thirty minutes. You do not need to purchase heavy machinery just to sink a dozen screws into soft pine. Learning about the best gardening tools for beginners on a budget prevents you from buying expensive gear you will never actually use again.
Keeping your tool list short ensures you stay well under your strict fifty-dollar spending limit. The entire goal is to maximize your food output while minimizing your initial financial risk.
Getting your lumber cut for free
Many apartment renters avoid building things because they do not own a circular saw. This lack of equipment stops them from trying to build a raised garden bed at all. Here is a non-obvious tip that completely solves this problem for small space growers.
Almost every major hardware store will cut your lumber to your exact measurements completely free of charge. Ask the lumber associate to cut one of your eight-foot boards exactly in half. You now have two four-foot pieces for the short ends of your wooden box.
Leave the other two eight-foot boards exactly as they are. This simple trick means all your wood will easily fit into the back of a small hatchback car. You walk out of the store with a ready-to-assemble kit.
Step by step guide to build a raised garden bed
Find a completely flat surface on your patio or driveway to assemble your wooden frame. Stand one long eight-foot board on its narrow edge. Stand one short four-foot board on its edge to form a perfect right angle at the corner.
You must pre-drill your screw holes before driving the deck screws into the wood. Cheap pine splits extremely easily when you force a thick screw near the edge of the board. Drilling a small pilot hole takes two extra seconds and completely saves your lumber from cracking.
Drive three exterior deck screws through the face of the long board directly into the end of the short board. Put one screw near the top edge, one directly in the middle, and one near the bottom edge.
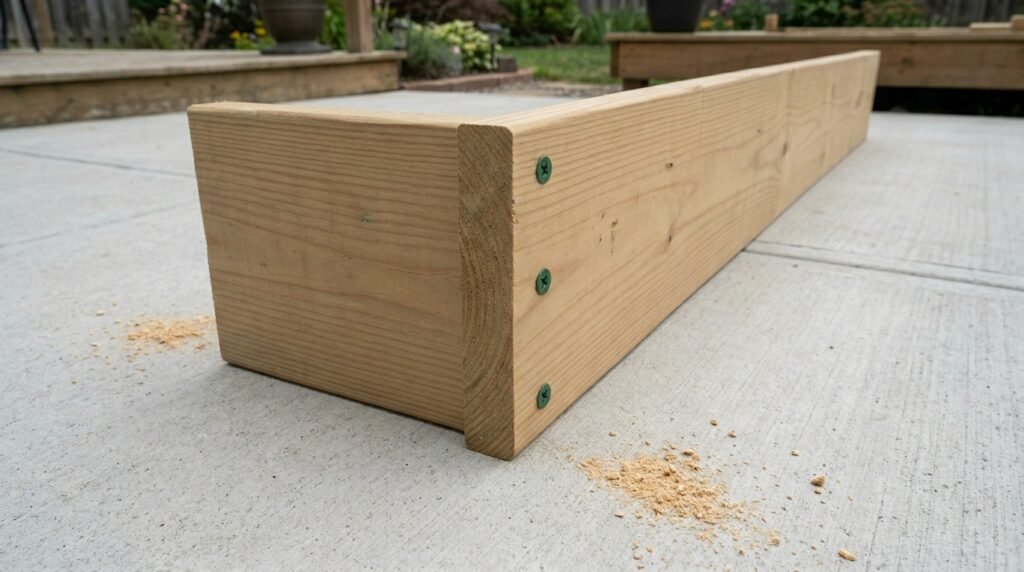
Fastening the corners securely
Repeat this exact same process for the remaining three corners of your wooden box. You are simply creating a large rectangle that measures eight feet long and four feet wide.
The entire assembly process takes less than twenty minutes even if you have zero previous carpentry experience. The final product gives you thirty-two square feet of prime vegetable growing space.
You might notice a few tiny gaps where the wooden boards do not meet perfectly at the corners. Do not worry about minor imperfections or slight warping in the pine. The heavy wet dirt will settle into those cracks and seal them up naturally after your very first watering session.
Placing your box after you build a raised garden bed
You must move your empty wooden frame into its exact permanent position before adding any dirt. Once you fill an eight-by-four box with damp soil, it will weigh over a thousand pounds. You will not be able to move it a single inch by yourself.
Choose a spot on your patio or yard that receives at least six hours of direct sunlight every single day. Vegetables need massive amounts of light energy to produce heavy crops of edible food.
Make sure you leave enough room to walk completely around the outside of the wooden box. You need easy access to all four sides for comfortable watering, weeding, and daily harvesting.
Protecting the bottom of your new frame
If you place the box on a wooden deck or a concrete balcony, you need to protect the floor. Lay down a heavy sheet of landscaping fabric before you pour in the dirt. Staple the fabric to the bottom edges of your wood to keep the soil from washing out onto your patio.
If you are building your box directly over a grassy yard, lay down a thick layer of plain brown cardboard first. The cardboard kills the grass underneath and attracts beneficial earthworms to your new garden space.
If you deal with aggressive moles or gophers in your neighborhood, staple hardware cloth to the bottom. This metal mesh prevents digging pests from stealing your root vegetables from below.
Filling the frame after you build a raised garden bed
Buying enough premium bagged soil to fill a massive wooden frame will instantly break your budget. You have to get highly creative with how you fill the bottom half of the box to save money.
Collect dry leaves, small dead twigs, and clean grass clippings to fill the bottom six inches of the wooden frame. These free organic materials take up massive amounts of physical space and slowly break down into excellent plant food.
Reading up on the best soil mix for a raised bed vegetable garden shows you exactly how to layer these organic materials effectively. You only need to use your expensive bagged compost for the top few inches of the box.
Planting your very first crops
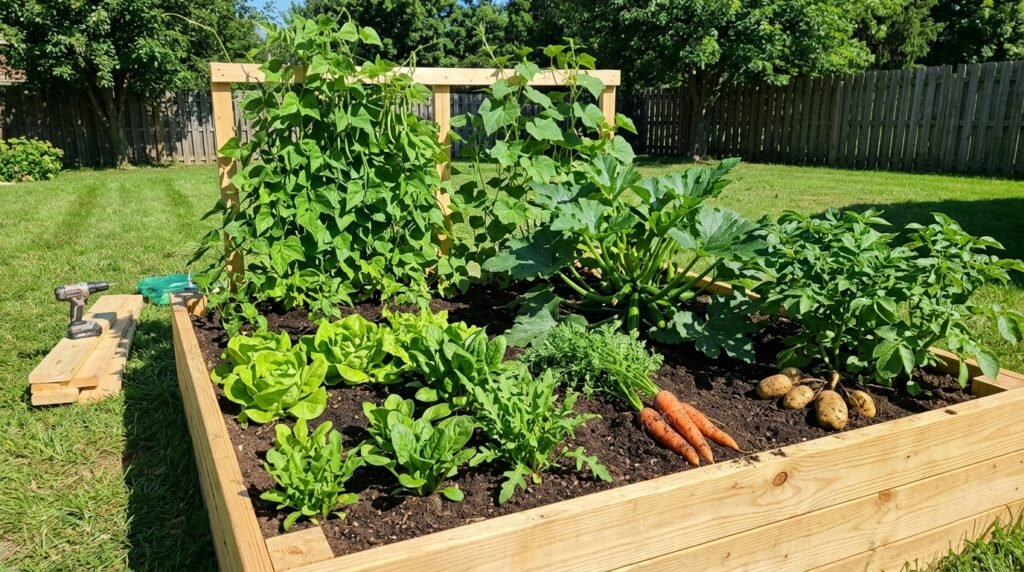
A large wooden frame allows you to grow significantly larger crops than standard plastic patio pots. You finally have the depth required to grow massive root vegetables like deep carrots and heavy potatoes.
You can also easily support heavy producers like sprawling zucchini plants and productive bush beans. The deep soil volume retains moisture beautifully during hot summer afternoons so your plants never wilt.
Figuring out what to plant in a raised bed as a beginner helps you maximize every single square inch of your new project. Group your tall climbing plants on the north side of the box so they do not shade out your smaller leafy greens.
You do not need to be a master carpenter or spend a fortune to grow your own food at home. Taking the time to build a raised garden bed gives you a permanent and highly productive growing space for years to come. Grab a basic drill, buy some cheap pine lumber, and start building your own backyard farm this weekend.