
I learned a harsh lesson during my first year gardening on my Portland apartment balcony. I planted a small sprig of peppermint next to my delicate basil in a wooden planter box. That single innocent stem turned into a massive monster within two short months.
It choked out every other plant and sent thick white roots straight through the bottom of the box. I grabbed my trusty eight dollar trowel and spent hours digging out the tangled mess. You must learn how to grow mint in containers if you want to enjoy this herb safely. Keeping this aggressive plant isolated saves your other vegetables from total physical destruction. You get all the fresh iced tea you want without sacrificing your entire patio space.
Why you must grow mint in containers exclusively
Mint possesses a genetic survival instinct that rivals most common noxious garden weeds. The plant sends out thick underground runners called rhizomes that travel horizontally through the potting dirt. These runners shoot up brand new plants wherever they find an inch of available sunlight. This aggressive behavior makes the plant completely unsuited for shared wooden boxes or open backyard dirt.
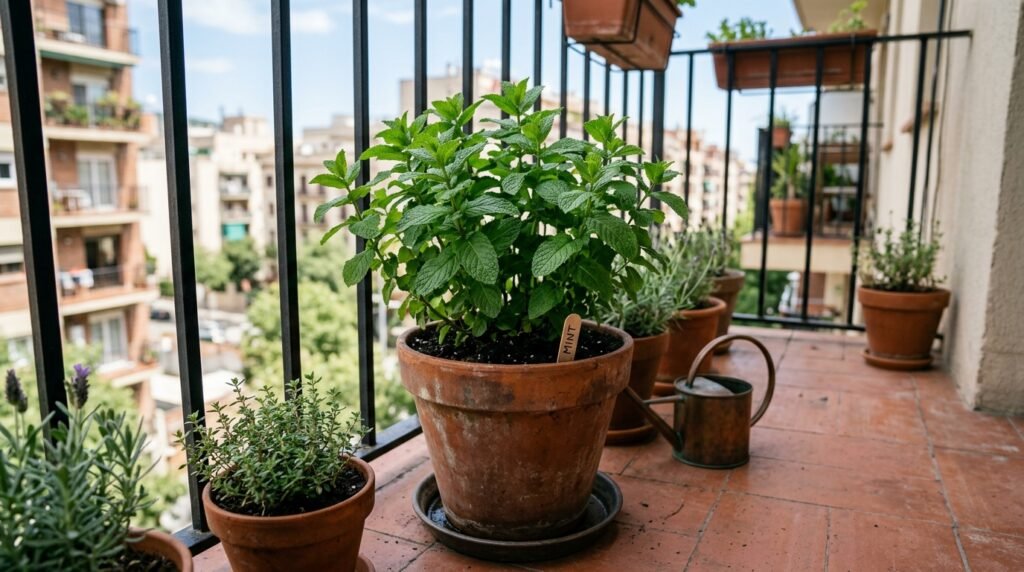
When you choose to grow mint in containers, you build an impenetrable physical fortress around the root system. The plastic or clay container walls stop the horizontal spread dead in its tracks. You force the plant to grow upward into a thick, bushy shape instead of a sprawling carpet.
Understanding how the runners behave
The thick rhizomes will search desperately for any possible escape route from their isolated pot. They will creep over the top lip of a small container and dive straight into a neighboring planter box. You must maintain a strict physical gap between your isolated pot and your other delicate herbs.
Living in Portland taught me that constant spring rain kicks this aggressive growth cycle into high gear. Our wet Oregon weather creates the absolute perfect breeding ground for these traveling root systems. You have to watch the physical edges of your pots closely during the damp spring months.
Choosing the right pot for your aggressive herb
You do not need a massive half whiskey barrel to keep this resilient plant perfectly happy. A standard twelve inch round container provides plenty of room for a healthy single herb plant. Width matters significantly more than depth because the root system strongly prefers to run shallow and wide across the dirt.
Plastic pots hold moisture incredibly well during the hot summer afternoons on a south-facing balcony. Terra cotta pots breathe easily but dry out much faster and require you to water the dirt constantly. I started my setup with heavy plastic recycled yogurt containers before upgrading to basic resin pots.
The absolute necessity of drainage holes
You cannot grow any healthy food in a solid bucket without proper bottom drainage holes. Standing water drowns the delicate roots and creates a rotting swamp at the bottom of the plastic. Grab a cordless drill and punch at least four large holes in the bottom of your resin pot.
You want the excess liquid to rush out onto your concrete patio immediately after a heavy watering session. Quick drainage keeps the soil oxygenated and prevents awful fungal diseases from attacking the main stems.
The best soil mix to grow mint in containers
Heavy backyard mud will suffocate your herbs and turn into a solid brick by late August. You need a light, fluffy potting mix that holds basic moisture but drains excess liquid rapidly. Checking out best soil mix for a raised bed vegetable garden shows you how to blend the perfect organic foundation.
Mix a large handful of white perlite into your standard potting soil to create tiny air pockets. Add a solid scoop of rich organic compost to give the hungry roots a reliable source of natural nitrogen. This fluffy blend keeps the plant pushing out fresh green leaves all summer long.
A non-obvious trick for bottom drainage
Those thick rhizomes will literally grow straight down and push out through the bottom drainage holes of your pot. Once they hit the wet patio concrete, they will crawl directly toward your other vegetable planters. You can stop this sneaky escape route entirely using a simple item from your kitchen counter.
Place a standard paper coffee filter flat across the bottom of the pot before you add any dirt. The thin paper allows liquid water to drain perfectly while blocking the thick roots from squeezing through the plastic holes. This non-obvious trick contains the aggressive plant completely and saves you hours of frustrating cleanup.
Selecting the right variety for your balcony farm
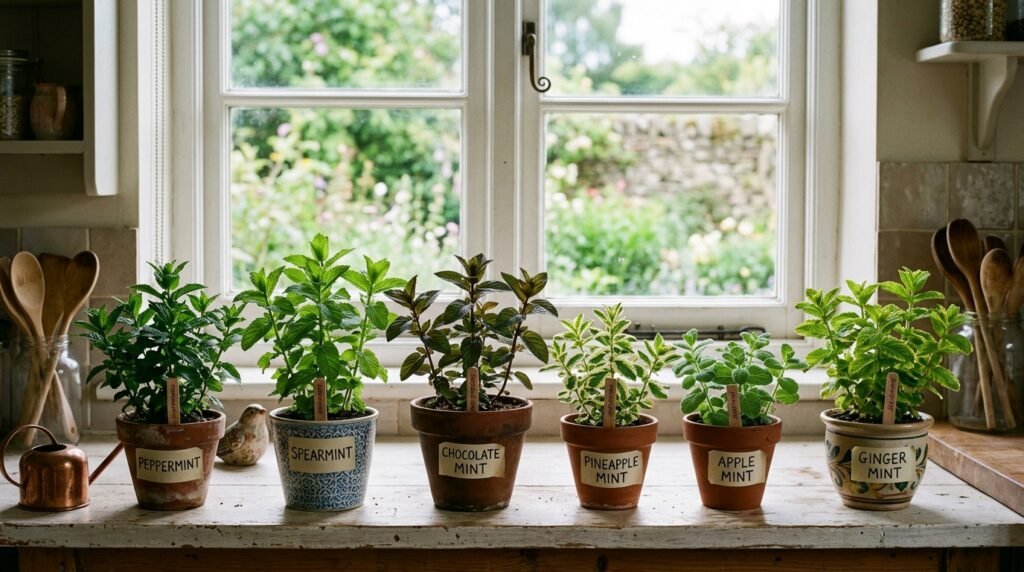
There are dozens of unique flavors available at your local garden center beyond the standard grocery store packs. Peppermint offers a sharp, intense flavor that works perfectly for drying into strong winter teas. Spearmint provides a much sweeter and softer taste that blends beautifully into fresh summer cocktails or fruit salads.
You can even find strange exotic varieties like chocolate mint or pineapple mint that smell exactly like their names. Finding out how to start a vegetable garden at home with no experience encourages you to experiment with these fun, unique varieties.
Sourcing strong starter plants
I highly recommend buying a healthy starter plant from a local nursery instead of planting tiny dry seeds. Mint seeds take an incredibly long time to germinate and often produce weak, straggly plants during their first year. A small four inch nursery pot will explode into a massive bush within a few weeks of transplanting.
Inspect the nursery pot carefully and choose a plant with bright green leaves and thick, sturdy stems. Avoid any plants that show yellowing leaves or tiny spider webs hiding under the foliage.
Managing light and water on a sunny patio
This specific herb tolerates a surprising amount of shade compared to sun loving tomatoes or peppers. It actually prefers taking a break from the intense afternoon solar radiation during the hottest months. You can tuck your pot into a partially shaded corner of your balcony and watch it thrive perfectly.
If you only have a blazing hot south-facing exposure, you must check the soil moisture every single morning. The harsh sun bakes the plastic pot and evaporates the trapped water rapidly into the air. You will successfully grow mint in containers if you never let the dirt turn completely bone dry.
Watering deeply and effectively
Do not just splash a tiny cup of water onto the top layer of the dry dirt. Pour a heavy stream of water directly over the soil until it runs out the bottom drainage holes completely. This deep watering technique forces the root system to grow downward instead of circling the dry surface.
Wait until the top inch of the soil feels dry to your bare finger before you water the pot again. Maintaining this strict manual checking routine prevents accidental flooding and keeps the plant highly productive.
Harvesting heavily to grow mint in containers successfully
Most beginners treat their herbs far too gently and refuse to cut them back often enough. You must harvest this plant aggressively to force it to produce tender and delicious new growth. Leaving the long stems alone creates a tall, woody plant with very few edible green leaves.
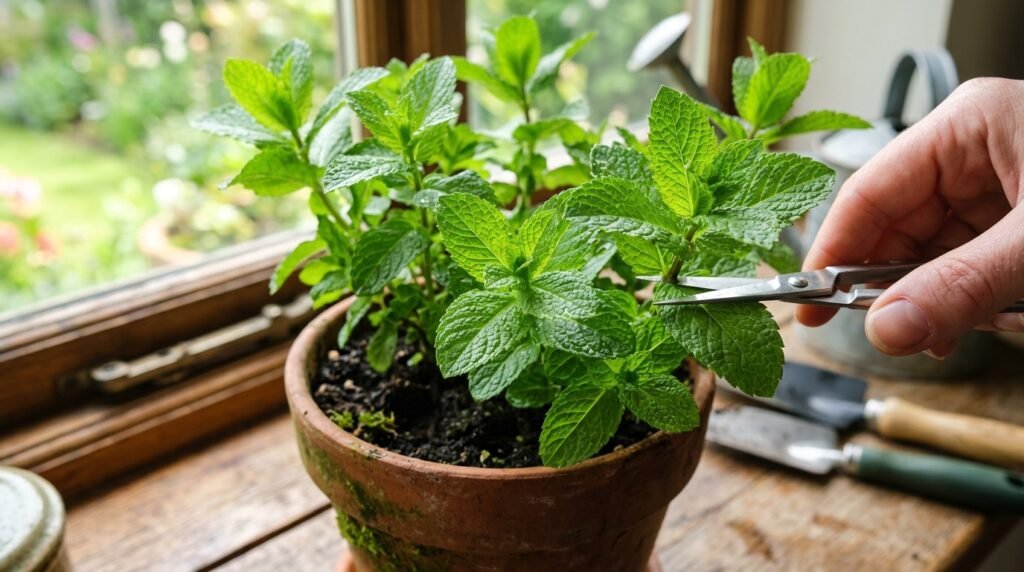
Take sharp kitchen scissors and cut the tallest stems right above a thick leaf node. The plant will split into two brand new branches exactly where you made the clean cut. Frequent haircuts keep the container looking thick, bushy, and incredibly healthy throughout the hot summer.
Stopping the flowering process
The plant will eventually try to produce tall purple or white flower spikes in late summer. You must cut these flowers off the exact second you see them forming on the tips of the stems. Allowing the plant to bloom completely ruins the sweet flavor of the green leaves.
The flowers turn the foliage bitter and tough as the plant shifts its energy toward seed production. Pinching the buds off forces that vital energy right back into growing delicious new leaves for your iced tea.
Feeding the potting soil for maximum growth
A potted plant cannot send its roots deep into the earth to find fresh minerals and nutrients. You have to supply all the necessary nutrition directly to the isolated plastic bucket yourself. The plant consumes massive amounts of nitrogen to maintain that rapid and aggressive leaf production.
Pour a diluted liquid fish emulsion over the damp soil once a month during the peak growing season. The experts at The Old Farmer’s Almanac strongly recommend keeping fertilizer applications light to preserve the strongest essential oils. Too much heavy synthetic fertilizer actually dilutes the potent flavor and fresh scent of the herb.
Recognizing signs of starvation
Watch the lowest leaves on the stems carefully for the first signs of poor soil nutrition. If those bottom leaves turn pale yellow and drop off, the plant needs an immediate liquid feeding. Yellowing indicates the roots have completely exhausted the nitrogen supply hiding in the potting mix.
A quick dose of liquid food will restore the deep green color within a few short days. You only need to feed the plant from late spring until early autumn when active growth naturally slows down.
Root division to grow mint in containers year after year
The aggressive roots will eventually fill every single square inch of your plastic pot. The plant becomes completely rootbound and stops producing fresh leaves entirely because it runs out of physical space. Water will run straight down the sides of the pot without soaking into the dense root ball.
You must divide the plant every two years to keep it alive and producing high quality food. Pull the entire solid mass out of the pot and lay it flat on your patio concrete. Take a sharp knife and cut the root ball straight down the middle into two equal halves.
Refreshing the old potting dirt
Throw one half of the old root ball away or give it to a brave gardening friend immediately. Place the remaining half back into your plastic pot and pack fresh potting soil tightly around the empty edges. This brutal division process sounds terrifying but actually saves the plant from slowly suffocating itself.
The fresh dirt provides a massive boost of nutrition and gives the roots physical room to breathe again. Reviewing how to grow herbs in a small apartment kitchen reminds you that tight container spaces require regular root maintenance.
Winter protection when you grow mint in containers
This tough perennial handles freezing temperatures incredibly well when planted deep in the backyard ground. Potted roots lack that massive blanket of surrounding earth and face a higher risk of cold winter damage. The harsh freezing air attacks the thin plastic sides of the exposed pot directly.
You do not need to bring the pots inside your warm apartment during the dark winter months. Just push the container flat against the exterior wall of your building to block the harshest freezing wind. The radiant heat escaping from the apartment wall provides enough protection to keep the dormant roots alive safely.
Preparing for the spring return
The green tops will die back completely and look exactly like dead brown sticks by late December. Take your sharp scissors and cut all the dead stems totally flush with the potting soil. Leave the bare pot outside and let the winter rain keep the dormant roots slightly damp.
Brand new bright green shoots will push through the cold dirt as soon as the spring days grow longer. You will feel incredibly proud watching your dormant pot explode back to life for another busy season.
Keeping a garden organized in a tight space requires setting strict physical boundaries for aggressive plants. You do not have to skip this delicious herb just because it likes to spread out and conquer territory. You simply trap it inside a sturdy plastic pot and manage the top growth with sharp scissors constantly. A single well-maintained pot provides enough fresh leaves to supply your kitchen from spring until the first winter freeze. Follow these simple rules to grow mint in containers and keep your peaceful patio farm completely under control.
Felipe Macedo is a home gardener and food grower based in Portland, Oregon. After killing his first three tomato plants, he became obsessed with figuring out how to grow real food in small spaces — on balconies, in containers, and in raised beds he built himself. At Chatinovax, he shares everything he learned the hard way so you don’t have to.