
I remember dragging a massive bag of heavy potting dirt up the stairs to my south-facing Portland balcony. I desperately wanted to plant something that would actually survive the constant autumn drizzle we get in the Pacific Northwest. I grabbed my rusty eight dollar trowel and decided to fill my wooden boxes with tough leafy greens. If you want a crop that produces massive amounts of food through terrible weather, you need to grow kale in a raised bed this season. This specific plant laughs at freezing temperatures and keeps producing fresh leaves for months on end.
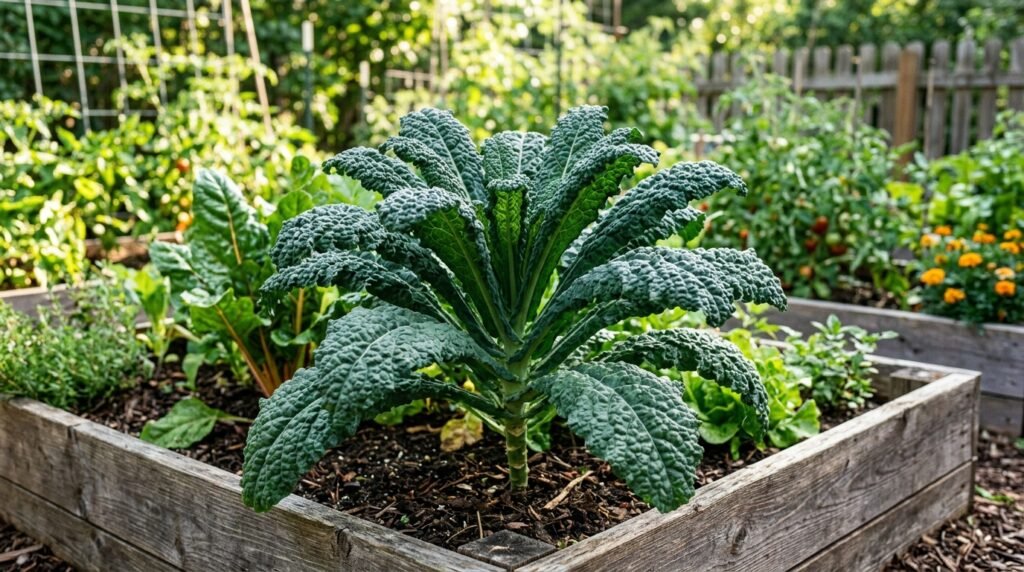
Why you should grow kale in a raised bed this season
Planting directly in the ground often leads to serious drainage problems and heavy pest pressure from slugs. When you choose to grow kale in a raised bed, you control the exact soil texture and moisture levels perfectly. You lift the foliage off the damp concrete and keep the leaves totally clean from splashing mud.
This physical elevation also saves your lower back from constant bending during your weekly harvesting chores. You can easily spot hungry caterpillars hiding on the underside of the leaves when the plants sit higher up off the ground.
Selecting the proper container dimensions
Kale develops a surprisingly thick and deep root system to support those massive green leaves above. A shallow window box will completely stunt the plant and leave you with tiny, tough foliage that tastes incredibly bitter. You need a container or wooden box that offers at least twelve inches of solid dirt depth.
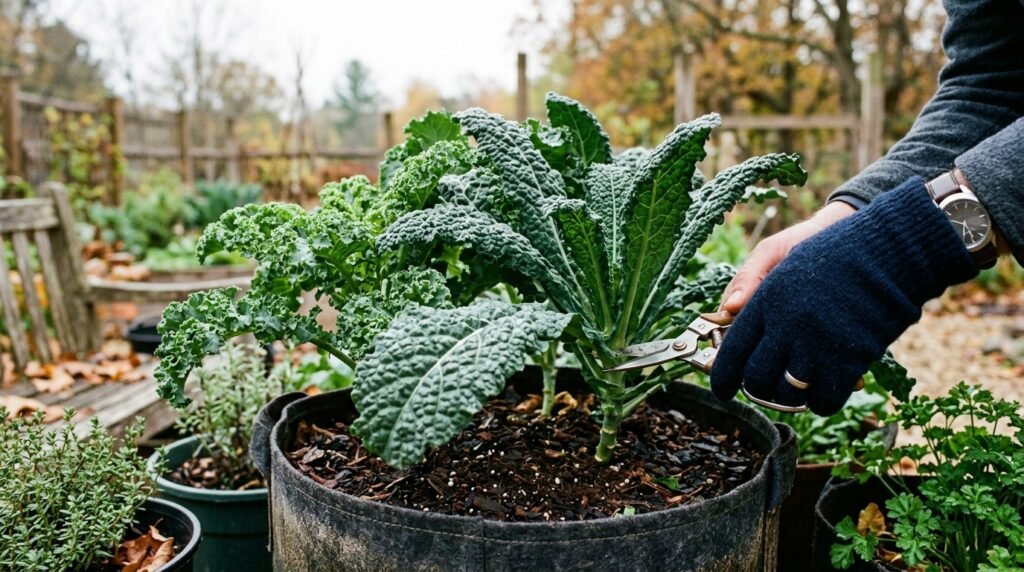
I highly recommend using fifteen gallon fabric grow bags if you cannot construct a wooden box right now. The porous fabric allows oxygen to reach the roots and prevents the soil from turning into a soggy mess during a heavy rainstorm.
Prepping the perfect dirt for your container
Heavy clay or cheap topsoil will suffocate the roots and cause the main stem to rot instantly. Prepping the soil to grow kale in a raised bed requires a premium potting mix packed with plenty of white perlite for maximum aeration. Learning about the best soil mix for a raised bed vegetable garden shows you exactly how to prep the foundation correctly.
Mix a heavy dose of organic compost directly into your dirt before planting your new seeds. This rich compost provides a steady supply of natural nutrients as the hungry plant establishes its thick root network.
A non-obvious trick for incredibly sweet leaves
Many beginners harvest their entire crop in early autumn before the cold weather actually arrives in full force. They miss out on the absolute best flavor this specific plant has to offer entirely by rushing the process. You should intentionally leave your plants sitting in the cold dirt until a heavy frost hits your patio.
This non-obvious trick forces the plant to convert its stored starches into natural sugars to survive the freezing cold. The freezing temperatures actually make the rough green leaves taste incredibly sweet and perfectly tender for your winter salads.
Sowing seeds to maximize your patio space
You can start your seeds in small recycled yogurt containers inside your warm kitchen to get a head start. This indoor protection saves the fragile sprouts from hungry birds and harsh spring winds during their first few weeks. Move the strong seedlings outside once they develop three or four true leaves on their main stem.
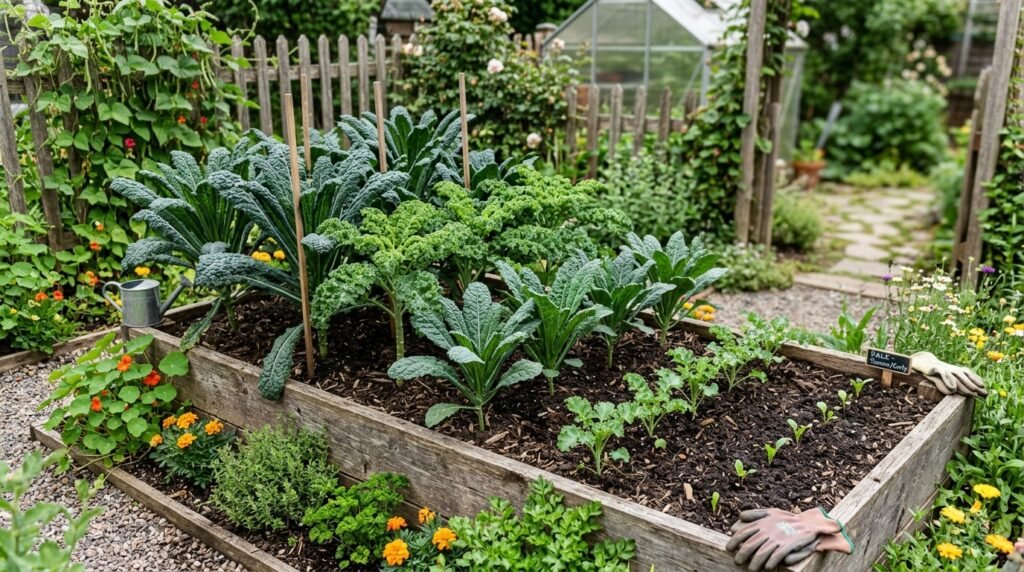
When you finally prepare to grow kale in a raised bed, you must give every single plant plenty of physical room. Space your seedlings at least twelve inches apart to allow the mature leaves to spread out fully.
Thinning extra sprouts ruthlessly
If you plant seeds directly into the outdoor soil, you will end up with dozens of tiny sprouts clustered together. You cannot let them all survive or they will completely choke each other out fighting for basic sunlight. You must thin the herd until only the absolute strongest and tallest plants remain standing in the dirt.
Take sharp scissors and cut the extra seedlings right at the soil line instead of pulling them. Pulling the unwanted plants by their stems will drag and destroy the fragile roots of the surviving neighbors.
Watering strategies for massive green leaves
These massive leafy plants drink a ridiculous amount of water during a hot summer afternoon. The large surface area of the leaves allows moisture to evaporate rapidly into the dry air around your balcony. Learning to grow kale in a raised bed successfully means checking the soil moisture every single morning before the intense sun hits the patio directly.
Pour water evenly across the entire surface until liquid runs out the bottom drainage holes onto the concrete. Understanding how to water a vegetable garden without overwatering prevents you from accidentally drowning the deep roots completely.
Using mulch to lock in vital moisture
The summer wind blowing across an exposed balcony dries out potting soil incredibly fast and stresses the plants. You must protect the top layer of dirt from the harsh sun and constant dry breeze to maintain hydration. Spread a two inch layer of clean straw or shredded leaves directly over the exposed potting soil.
This physical blanket blocks the solar rays and drops the soil temperature significantly during the hottest summer months. It also stops aggressive weed seeds from finding the sunlight they need to sprout and steal your valuable nutrients.
Feeding your hungry plants throughout the summer
You need a massive amount of soil nutrition to grow kale in a raised bed from start to finish. You must supply plenty of nitrogen to keep the biological engine running at full speed all summer long. If the lowest leaves start turning pale yellow, the plant is literally starving for basic food and needs immediate help.
Apply a strong liquid fish emulsion to the damp soil every two weeks during the peak growing season. The plant experts at Bonnie Plants recommend consistent feeding to ensure the leaves stay dark green and highly productive.
Dealing with intense summer heat
Kale prefers cool weather and will suffer greatly when August brings brutal heat waves to your city. The hot soil stresses the plant and makes the green leaves taste extremely bitter and tough to chew. You must provide some artificial shade during the hottest hours of the late afternoon to protect the harvest.
Slide a tall potted tomato plant directly in front of your leafy greens to cast a cooling shadow. You can also drape a light piece of white cloth over a wooden frame to block the intense solar radiation completely.
Fighting common pests on an apartment balcony
You might assume an apartment balcony keeps your food completely safe from hungry garden insects. Unfortunately, small white cabbage moths possess an incredible ability to find vulnerable leafy greens from miles away. They lay tiny yellow eggs on the absolute undersides of the leaves where you cannot easily see them.
These eggs hatch into fat green caterpillars that will strip your entire crop down to bare stems in two days. You must inspect the bottom foliage carefully and crush these yellow eggs with your bare thumb immediately to stop the invasion.
Utilizing physical insect barriers
Sometimes hand picking bugs off your plants becomes a completely overwhelming daily chore that ruins the fun of gardening. You can stop the moths from landing on your food by installing a floating row cover over the wooden box. This lightweight white fabric lets the sunlight through but blocks the flying insects entirely from reaching the leaves.
Reading how to protect your vegetable garden from pests without chemicals helps you master these simple physical barriers. You save your harvest without ever resorting to dangerous and expensive synthetic chemical sprays.
Harvesting correctly for continuous outdoor production
Most beginners ruin their plants by cutting the absolute top of the main stem right off during their first harvest. This terrible mistake stops the upward growth completely and forces the plant to stunt itself for the rest of the year. You must always harvest the oldest and lowest leaves first while leaving the top growing tip completely intact.
Snap the thick bottom stems off by pulling them downward sharply toward the dirt with a quick motion. The plant will continue pushing brand new growth out of the top center crown for many consecutive months.
Preparing your patio harvest for the kitchen
The thick central rib running down the middle of the leaf tastes incredibly woody and fibrous even after cooking. You must remove this hard stem before cooking or eating your fresh harvest raw in a healthy dinner salad. Hold the bottom of the stem firmly and strip the soft green leaf away with your other hand quickly.
Store the unwashed dry leaves in a sealed plastic bag inside your refrigerator crisper drawer to maintain their crispness. Washing them before storage adds extra moisture that quickly turns the fresh greens into a rotten pile of slime.
You do not need a massive backyard plot to secure a reliable supply of fresh organic greens for your kitchen. A simple wooden box or a large fabric bag provides plenty of physical space for these tough plants to thrive. You just need to supply consistent moisture, block the hungry caterpillars, and harvest the lower leaves properly to maintain growth. Once you learn how to grow kale in a raised bed, you will never buy those sad plastic bags at the grocery store again. Grab your trowel and plant a few seeds this weekend to start your own highly productive patio farm.
Felipe Macedo is a home gardener and food grower based in Portland, Oregon. After killing his first three tomato plants, he became obsessed with figuring out how to grow real food in small spaces — on balconies, in containers, and in raised beds he built himself. At Chatinovax, he shares everything he learned the hard way so you don’t have to.