
I spent my first Portland spring trying to push tiny dry onion bulbs into completely wet mud on my apartment balcony. I bought a cheap bag of sets at the hardware store and assumed they would magically turn into giant slicing vegetables. They rotted instantly in the cold rain and left me with empty yogurt containers. I grabbed my trusty eight dollar trowel and decided to learn how to actually grow onions from seed the proper way. It takes a little more patience but yields significantly better results on a small apartment balcony. You get to control the entire process and choose varieties that actually taste good.
Why you should grow onions from seed instead of sets
Buying dry sets seems like the absolute fastest way to get food onto your dinner plate. The problem is those tiny bulbs spent months sitting in a dormant state inside a hot warehouse. They often bolt and produce bitter flowers the second you put them in the damp patio dirt. When you choose to grow onions from seed, you prevent this frustrating bolting problem entirely. The plants never suffer that extreme storage stress and focus purely on growing a fat underground bulb.
Your patio crops will develop much healthier root systems when they start their lives in fresh potting soil. Sets already have dried, damaged roots that struggle to absorb water and essential nutrients. Growing from scratch guarantees a vigorous plant that resists common soil diseases all summer long.
Selecting your container varieties
Seed packets also offer hundreds of unique flavors you will never find in a generic bag of dry sets. You can pick specific sweet or spicy types that perfectly match your daily cooking style. You also save a ridiculous amount of money starting from scratch every single spring. A single two dollar seed packet produces more food than you could possibly fit on a standard apartment patio.
You can grow rare red Italian varieties or massive sweet yellow Spanish types that cost a fortune at the supermarket. Having total control over your seed selection makes the entire gardening process much more rewarding.
Understanding daylight requirements for success
This specific crop relies entirely on the sun to tell it when to stop growing leaves and start forming a bulb. You must buy the correct type for your specific geographical latitude to get any actual food. Northern gardeners need long-day varieties that trigger bulb formation when the summer days stretch past fourteen hours. You must plan ahead to grow onions from seed successfully in your specific region.
Southern growers require short-day types that bulb up during the shorter days of late winter and early spring. If you plant the wrong daylight type for your zone, you end up with massive green stalks and absolutely zero underground food.
Getting the Portland timing right
Here in Oregon we strictly plant long-day or intermediate-day varieties to match our long summer light cycle. The agricultural experts at Burpee strongly advise checking your local daylight map before buying any seeds. Matching your seeds to your local sun exposure guarantees a massive harvest at the end of the season.
I made the mistake of planting short-day seeds during a Portland summer and harvested nothing but thick green grass. Paying attention to these basic biological light triggers prevents months of wasted physical effort on your balcony.
Starting your indoor nursery early
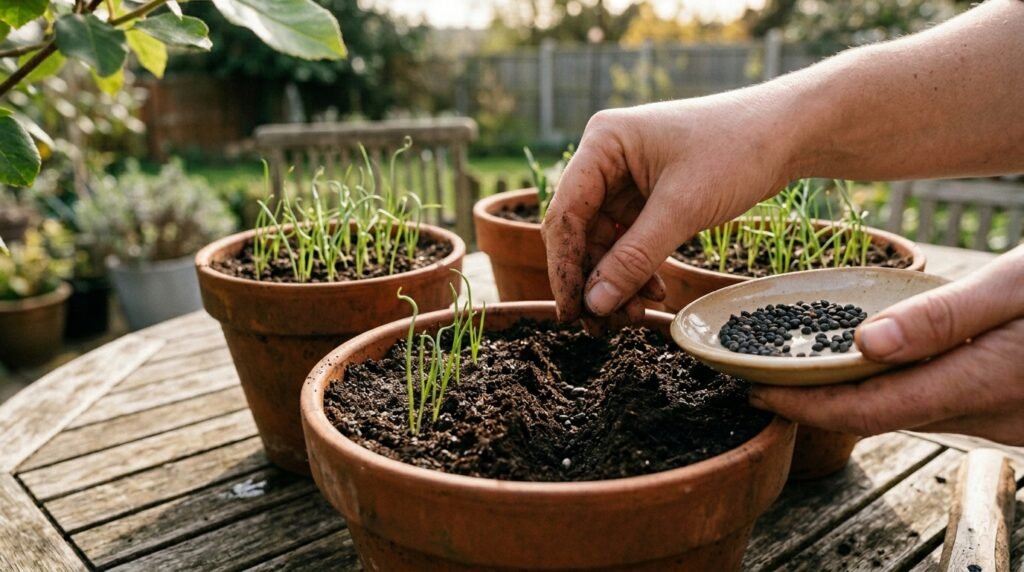
You need to start your indoor nursery operations long before the last spring frost ever arrives. I plant my tiny black seeds inside empty recycled yogurt containers right in my kitchen in late February. You want to give the plants at least eight weeks of safe indoor growth before moving them outside. It takes almost zero physical space to grow onions from seed inside a small apartment.
Fill your small cups with a very light seed starting mix and sprinkle the seeds directly on the surface. Press them gently into the damp dirt so they make solid physical contact. Do not bury them under heavy layers of thick mud or they will suffocate instantly.
Providing massive amounts of light
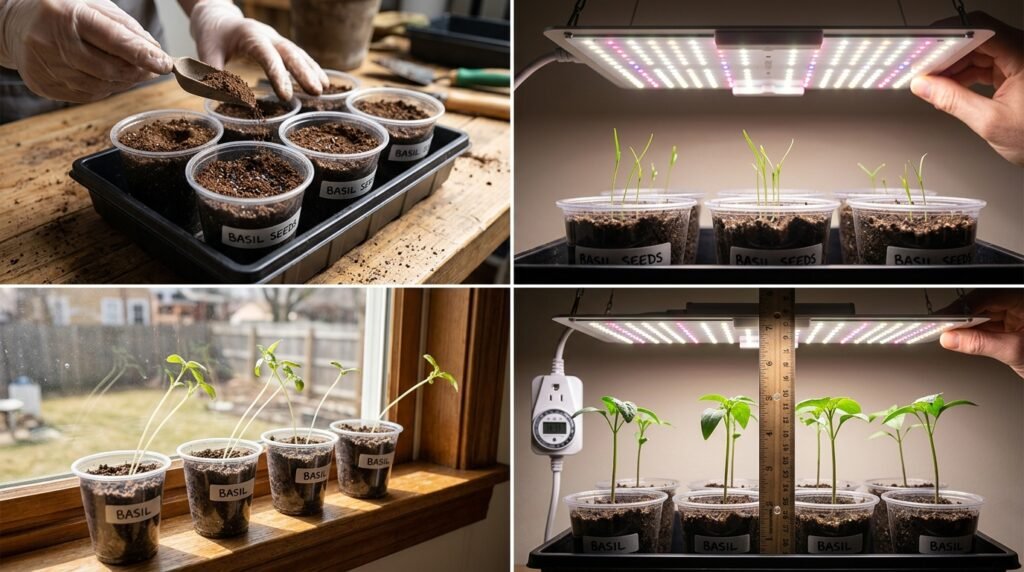
Cover the seeds with a tiny dusting of dry dirt and keep the containers consistently damp. The fragile green shoots will pop up looking exactly like tiny blades of grass in about ten days. You must place these cups directly under a strong artificial grow light immediately after they sprout.
A sunny windowsill rarely provides enough intense solar energy to keep the thin stalks standing straight up. The seedlings will stretch desperately toward the weak window light and become incredibly fragile. Keep the artificial light exactly two inches above the green tops for fourteen hours a day.
A non-obvious trick for strong transplants
The green shoots grow incredibly fast indoors and will quickly bend over under their own physical weight. They flop onto the wet dirt and rot before they ever reach the outdoor containers. You can stop this flopping entirely by giving your seedlings a strict weekly haircut. Take clean kitchen scissors and cut the green tops completely off once they reach five inches tall.
Trim them directly down to three inches tall every single time they get too long and heavy. This non-obvious trick forces the plant to stop growing upward and build a much thicker base instead. A thick lower stem survives the harsh outdoor wind significantly better than a tall skinny stalk.
Building thick lower stems
You can actually eat the tiny trimmed greens exactly like fresh chives on your baked potatoes or morning eggs. The plant does not mind this aggressive pruning and responds by pushing massive amounts of energy into the root zone. You want the roots fully developed before the plant ever sees the hot summer sun.
I keep trimming my indoor seedlings for two full months until the lower stems look as thick as a pencil. These sturdy little plants transplant into the outdoor containers perfectly without suffering any terrible shock.
Preparing the outdoor balcony containers
You need a container that provides at least ten inches of deep dirt to accommodate the expanding bulbs. Heavy plastic buckets or wooden crates work perfectly for small balcony farms and fit into tight corners. You must fill these containers with an incredibly loose and fluffy soil mixture. Checking the best soil mix for a raised bed vegetable garden shows you how to prep a fast draining environment.
Heavy clay or dense mud physically crushes the forming bulbs and restricts their final size completely. Add a massive handful of white perlite to your potting mix to ensure excess water drains rapidly after a rainstorm.
Fertilizing the soil correctly
You should also mix a heavy dose of organic compost into the dirt to provide slow release nitrogen. These hungry plants require massive amounts of nitrogen early in the season to build large green leaves. The final size of the underground bulb correlates directly to the size of the green leaves above.
Every single leaf represents one distinct layer of the finished vegetable. If you want huge food, you must feed the soil heavily to grow huge foliage during the spring months.
Moving the plants outside permanently
You cannot just throw your fragile indoor seedlings directly into the harsh outdoor climate on the first warm day. You must harden them off slowly over the course of an entire week to build their tolerance. Place your yogurt containers outside in a shady spot for just two hours on the first day. Slowly increase their direct sun exposure each afternoon until they handle a full day safely.
Dig a shallow trench in your large patio container and carefully separate the tangled root systems of your seedlings. Be incredibly gentle with the white roots so you do not snap them off the main stem.
Spacing the seedlings in the dirt
Plant each individual seedling exactly one inch deep and space them about four inches apart in the container. Proper spacing gives the underground bulbs enough physical room to swell without touching each other. Crowded plants compete viciously for water and produce tiny disappointing yields that look like large garlic cloves.
Press the fluffy dirt firmly around the base of each transplant so they stand up straight against the wind. Water the entire container deeply immediately after planting to settle the soil around the fresh roots.
Managing water for your outdoor containers
These plants possess surprisingly shallow root systems that dry out extremely fast in the summer wind. You must check the soil moisture daily to ensure the root zone stays consistently damp but never flooded. Managing the soil moisture allows you to grow onions from seed without split or cracked bulbs.
If the dirt completely dries out, the plant stops growing and forces the bulb to split into smaller pieces. Learning how to water a vegetable garden without overwatering keeps the growth steady and entirely uninterrupted all summer long.
Knowing when to stop watering completely
You maintain this strict watering routine right up until the middle of the hot summer. Eventually the green stalks will start to turn a pale yellow color and physically fall over onto the dirt. This falling action signals that the plant finished growing and is preparing for winter dormancy.
You must stop adding any water to the container the exact moment the green tops flop over. The plant seals the neck of the bulb to protect it from rot and disease.
The final harvest and curing process
Watering a mature plant forces the heavy bulb to rot right inside the dirt before you can harvest it. Let the container sit completely dry for about a week after the green tops collapse entirely. You can then gently pull the full bulbs straight out of the loose potting soil without using any sharp metal tools.
Brush the excess dirt off the roots with your bare hands carefully so you do not bruise the soft flesh. A bruised vegetable will rot quickly in storage and ruin the rest of your harvest.
Drying the bulbs for winter storage
The main reason we grow onions from seed involves the superior storage quality of the finished product. You cannot wash your fresh harvest or throw it directly into the refrigerator right away. The raw skin holds too much moisture and will mold quickly in a dark humid space.
You must cure the harvest in a warm and completely dry area with excellent airflow. A covered patio table or a dry apartment closet works perfectly for this crucial drying stage.
Prepping the food for your pantry
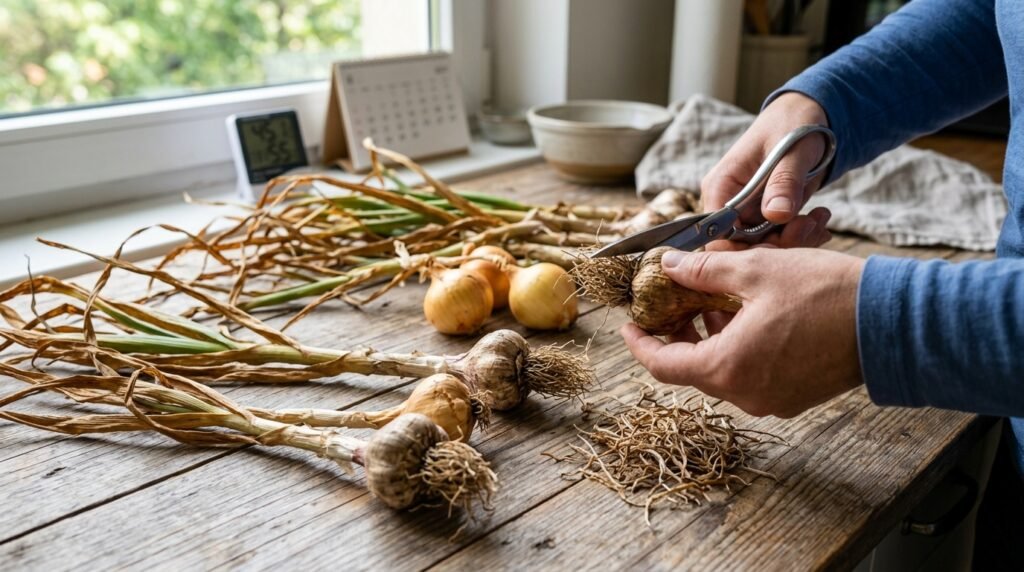
Leave the plants sitting on the table until the green stalks turn totally brown and the outer skin feels like dry paper. This curing process usually takes about two or three full weeks depending on the local apartment humidity. Take a sharp pair of scissors and cut the dried roots completely off the bottom of the vegetable.
Cutting the roots stops the vegetable from pulling any extra moisture from the surrounding air. This physical step seals the bottom of the bulb and guarantees a much longer shelf life.
Enjoying the rewards of your hard work
Cut the stiff brown stalk off about one inch above the top of the actual bulb. Store your cleaned harvest in a wire basket or a mesh bag in a cool dark kitchen cabinet. Reviewing the easiest vegetables to grow for beginners reminds you how rewarding these simple crops actually are.
Planning a balcony farm requires making smart choices with your limited physical space and available sunlight. Skipping the dry sets and choosing to grow onions from seed gives you total control over the final product. You get thicker stalks, better flavor, and reliable winter storage simply by starting a few weeks earlier inside your kitchen. Keep the soil loose, trim the early greens, and stop watering the second the tops fall over. You can easily grow onions from seed and enjoy massive yields from a few small plastic buckets.
Felipe Macedo is a home gardener and food grower based in Portland, Oregon. After killing his first three tomato plants, he became obsessed with figuring out how to grow real food in small spaces — on balconies, in containers, and in raised beds he built himself. At Chatinovax, he shares everything he learned the hard way so you don’t have to.